Projects
Projects can be used to organize your jobs and assets. You can also share your projects with other cloudlayer.io users to callaborate and share your jobs and assets with others.
Using a Project
In order to use an existing project you will use the projectId parameter in the job request. Any jobs created using this parameter will be marked as part of this project and will be filterable via the Project filter.
In addition, any assets created from jobs with a Project will also become part of that project.
Create a Project
To get started with projects, you must first create one. If you plan to share your project with other team members you will need to setup a team. If you don't have a team, you can add project members later by editing the project and adding them to it.
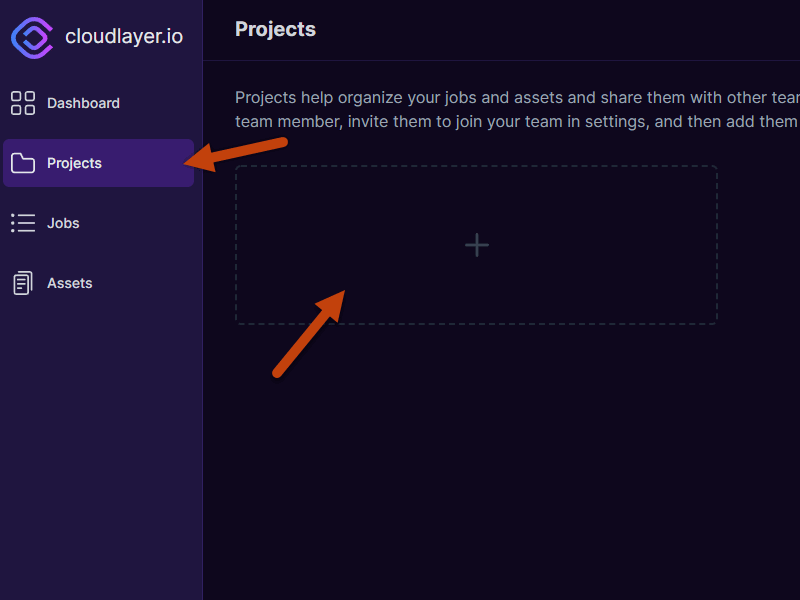
- View projects by going to the
Projectstab on the left sidebar. - Create a new project, click anywhere inside the dotted box with a
+symbol.
Project Info
A project consists of a couple pieces of information. The title, description, and members.
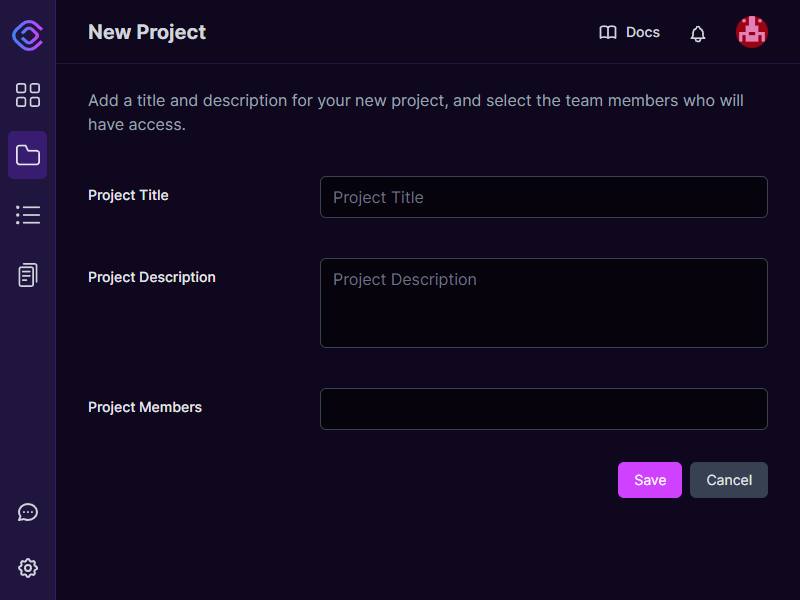
title
The title of the project, can be any valid string.
description
The description of the project to help explain what types of jobs and/or assets will be in this project.
members
Team members that you have shared the project.
Sharing a project with a team member will give that user full access to your jobs and assets of your account.
Project Members
The project members deserve a little bit of extra attention since there are a couple of things to explain.
Member Criteria
A couple of rules must get met to add a team member. You must be the owner of the project.
- The user you are trying to invite must be part of your accounts team, which gets explained in further detail in the Teams section.
- At least one remaining user slot is available in your account plan. If your plan only allows 1 team member, you can only share your projects with a single team member.
- Once those conditions have been satisfied, you can add a team member by clicking on the team member box. It will pop up a dropdown of valid members you can add to the project.
Created Project
Once a project gets created, it will show up as a card in the Projects window. If you are the project owner, it gets tagged with the owner tag. If another user has shared it with you, it will be tagged as shared.

Add Jobs to Project
In order to add jobs and assets to a project you need to pass in the projectId to the job. Any assets created by that job will automatically be added to the project as well.
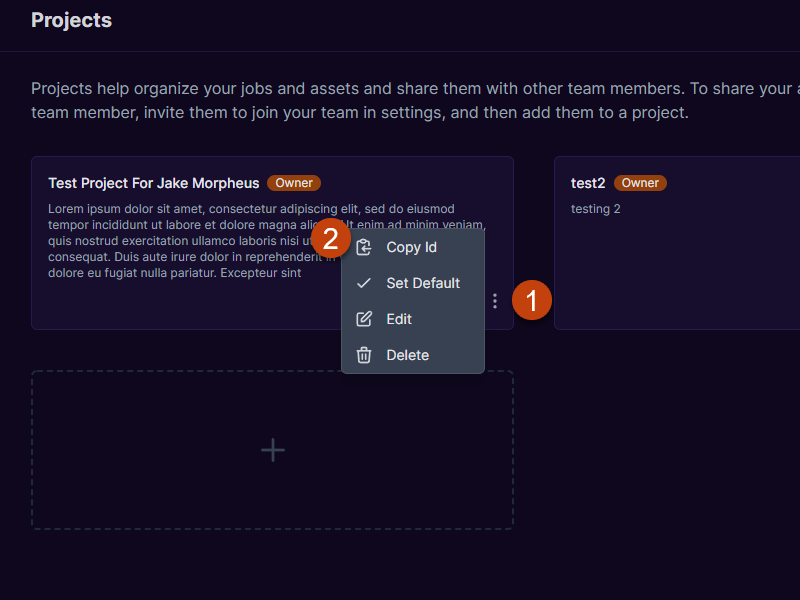
- Click menu icon on the project in the lower right hand corner of the project card.
- Select
Copy Idfrom the menu. This will copy the Project Id to your clipboard.
In your job request add the projectId property.
{
    "projectId": "N77VCoAVTHHwgmUfCYlD"
}
Project Filtering
When a project has been created a new filter will show up for jobs and assets under the corresponding jobs and assets tabs.
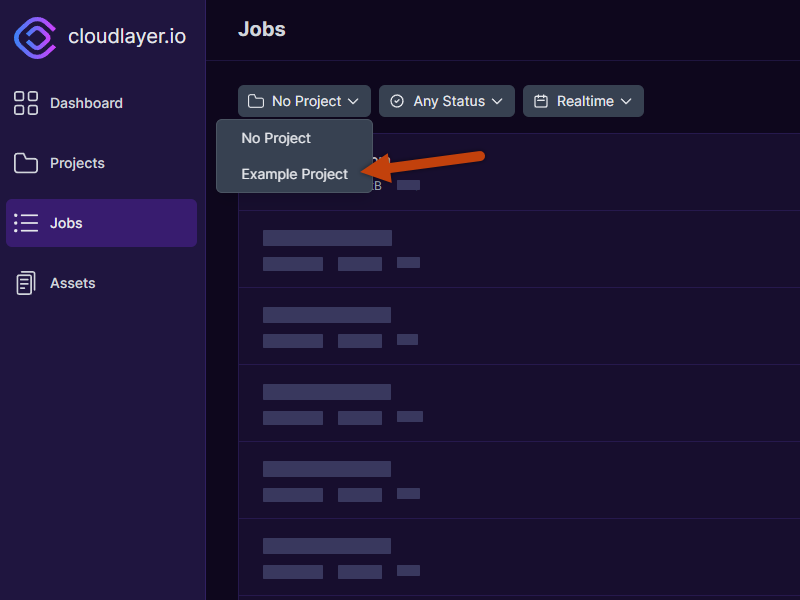
By default, projects and assets are filtered by No Project, but if you want a project you created to be the default filter, you can set it in the Projects window.
Project Default
Setting a project to default will change the job and asset filters to default for that project filter on load.
To set a project to default, you can follow these steps:
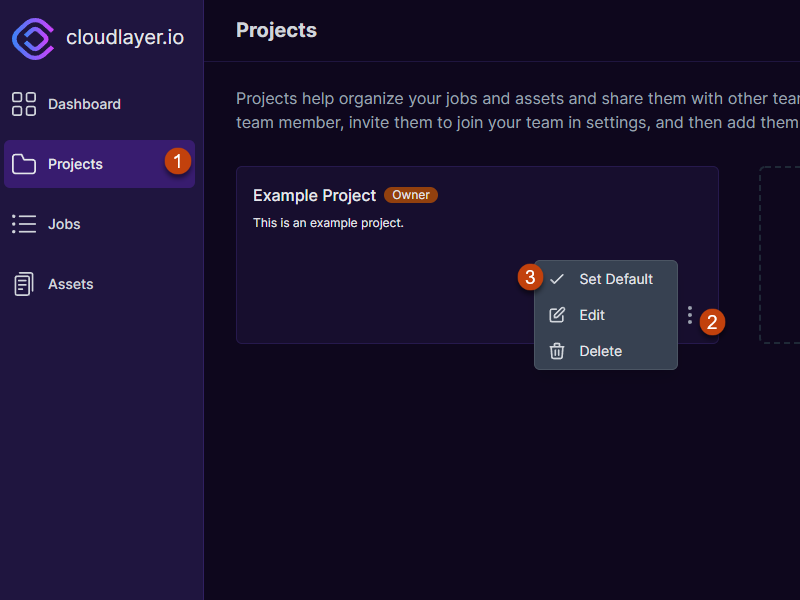
- Go to the project screen.
- Click the 3-dots in the lower right of the project card you want to make default.
- Choose
Set Defaultin the menu.
The project will now get marked as default, and an additional tag will appear on the card, indicating that it is not the default project.
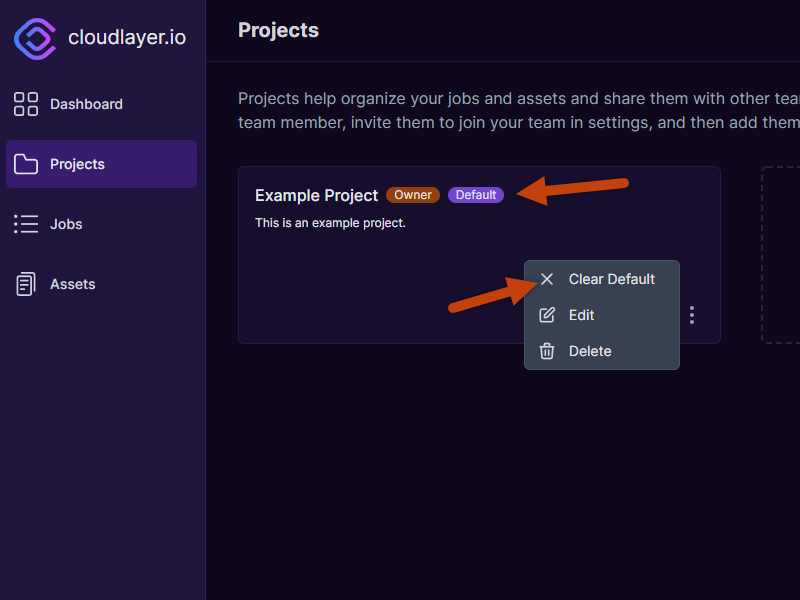
You can also clear the default by selecting Clear Default in the menu if you want to remove the default status of the project.
Shared Projects
If someone shares a project with you, it will be marked as shared in the Projects screen. The only difference in behavior is that you cannot modify a shared project.